Ads 468x60px

Saturday, October 12, 2013

Italian Bread

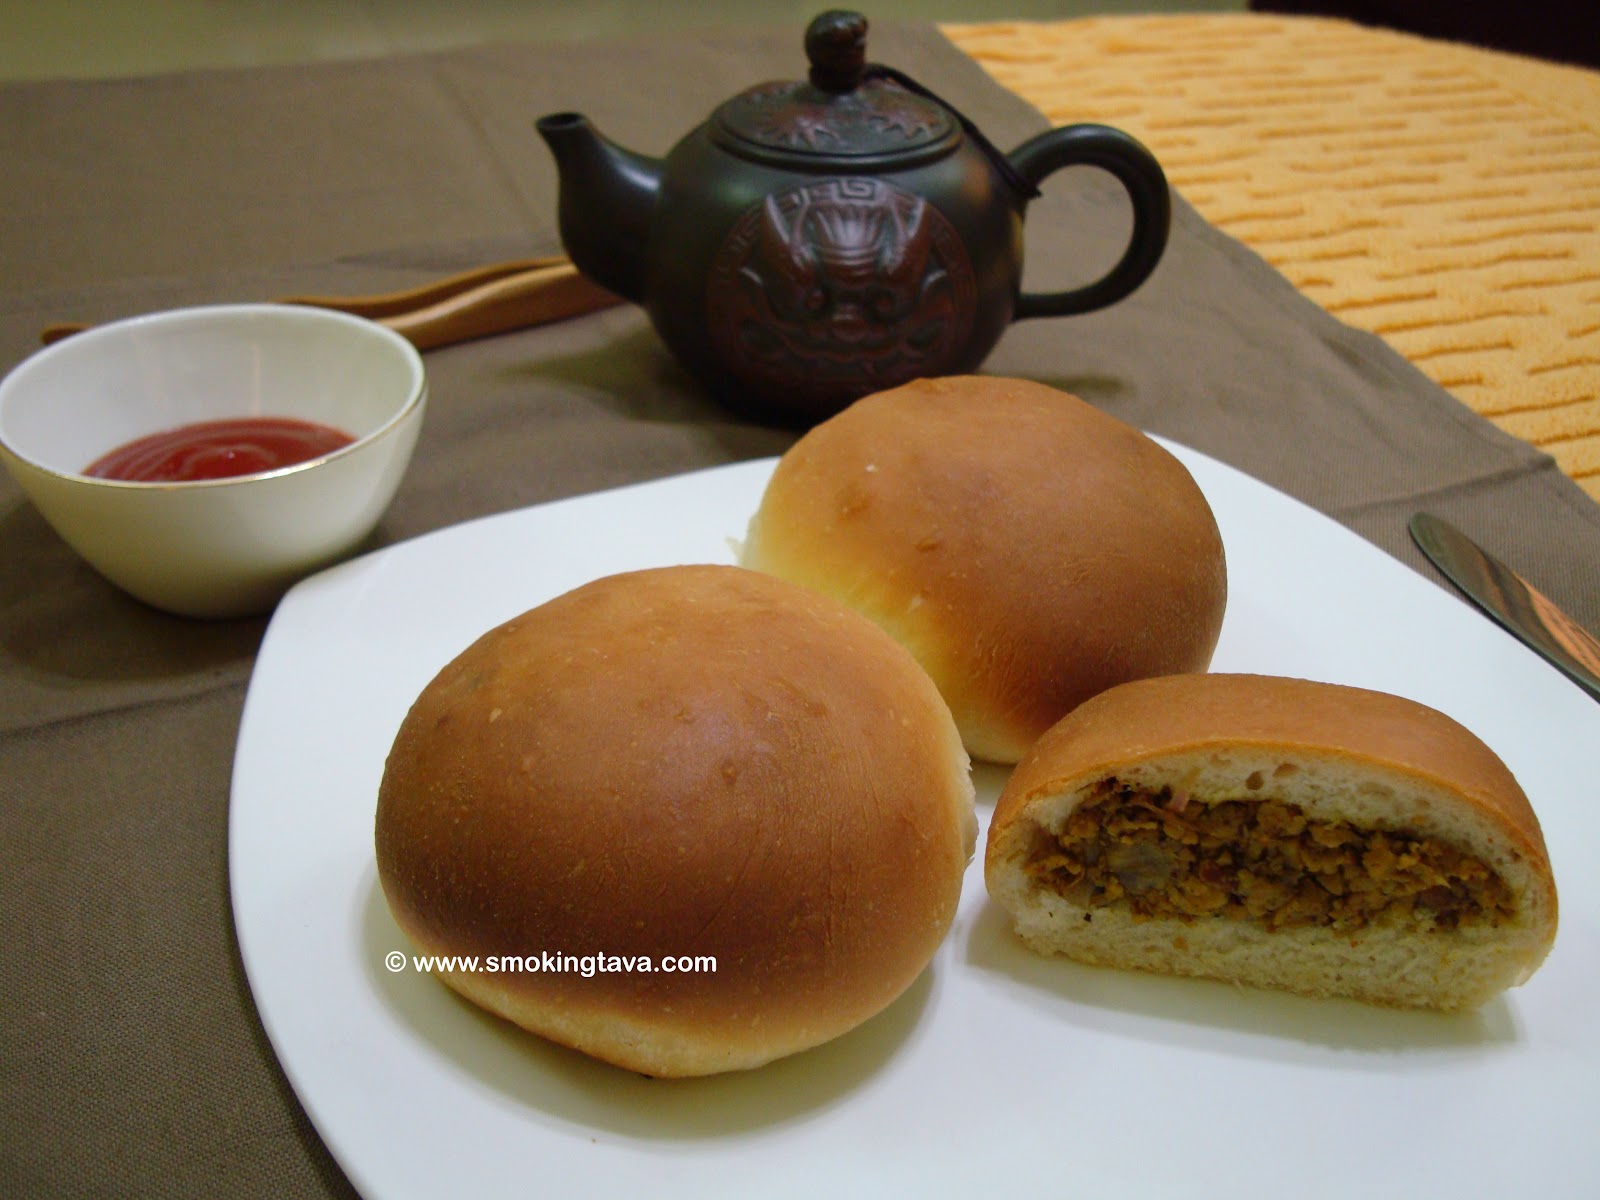
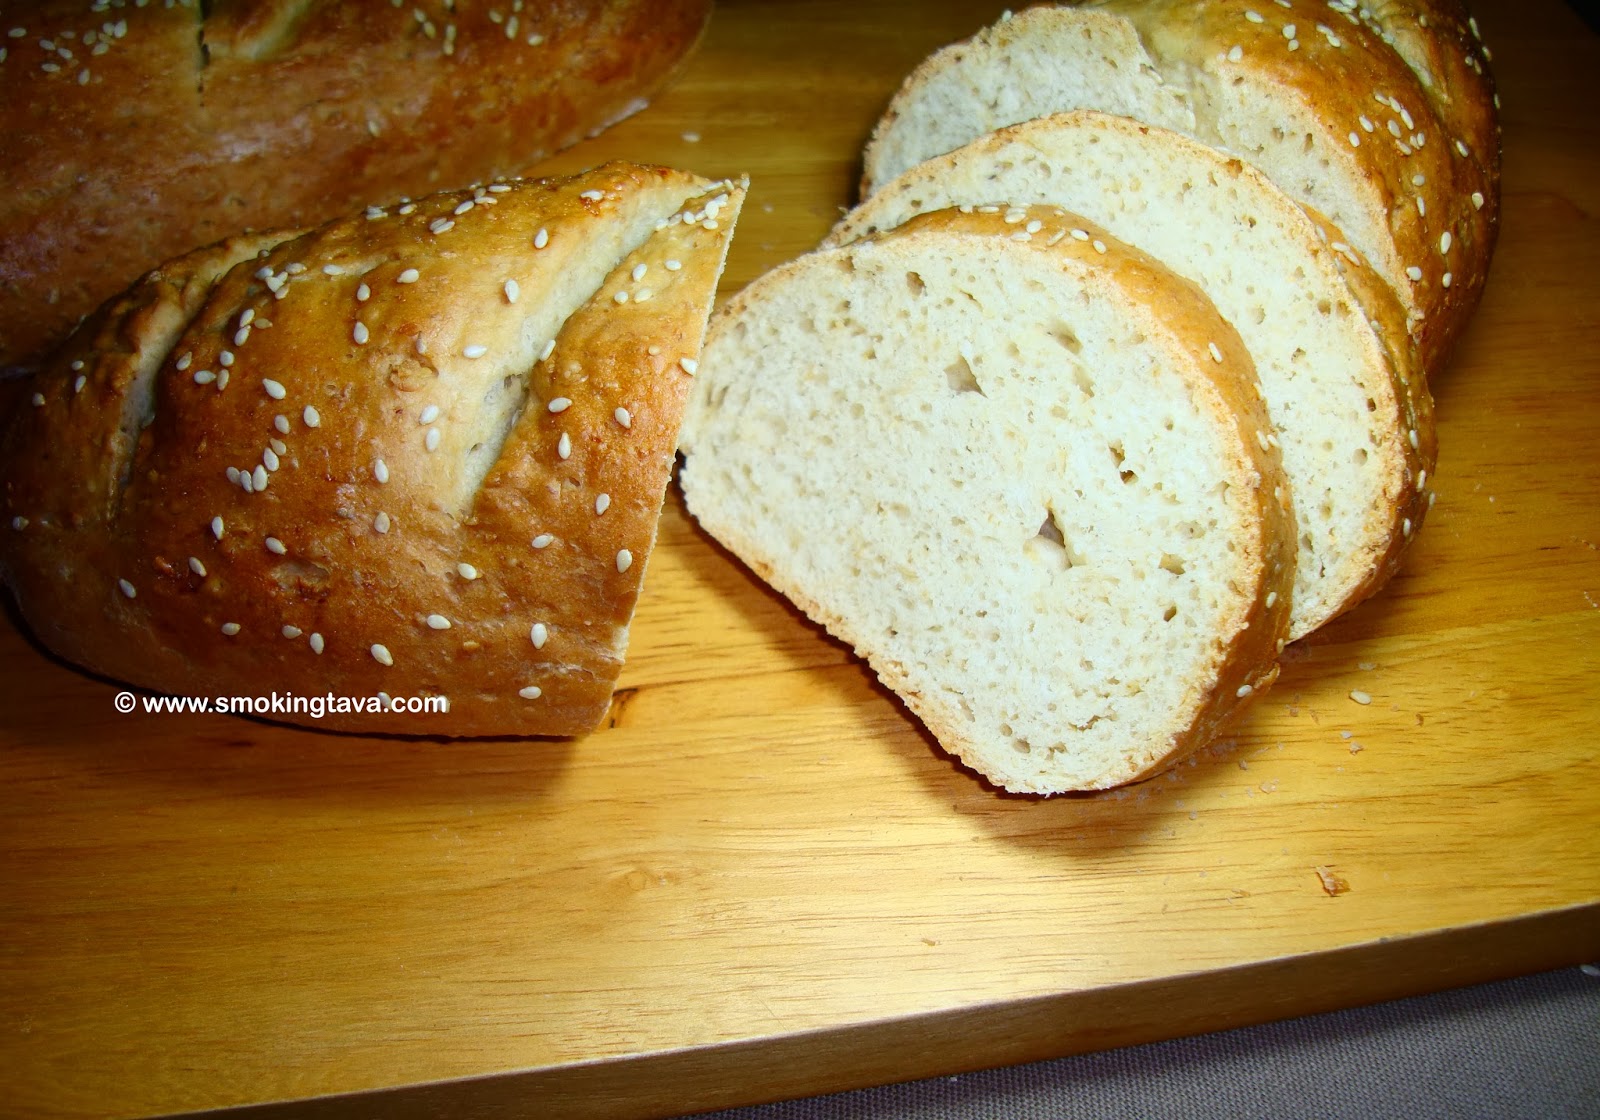
Another mouth watering bread recipe from your humble Smoking Tava kitchen. The classic Italian loaf can be enjoyed as a sandwich or an accompaniment to hot soup or pasta. I had made cheesy garlic bread slices out of this wonderful recipe. Unfortunately couldn't capture any photographs of the garlic bread for reasons beyond one's control :).
Ingredients:
All purpose flour (Maida) - 3 cups
Water - ¾ cup, lukewarm
Milk - ½ cup, lukewarm
Oil - ¼ cup
Active dry yeast - 2 tsp
Sugar - 2 ½ tsp
Salt - 1 ¾ tsp
Egg - 1, White separated
Cold water - 1 tbsp.
 
Method:
In a bowl, add milk and water, dissolve the sugar and yeast in it. Leave the yeast mixture for around 10 minutes. Whisk in the oil, add salt. Take flour in a large bowl, form a well in the middle, add the yeast mixture little by little, keep mixing the flour with the help of a fork. Use the dough maker if you have one and run it on medium speed. You can also use a hand blender with kneading attachment. If you feel the mixture is quite loose, cover it with a damp towel and leave it for couple of minutes before you start working on it again. Dust a flat surface with flour and knead the dough thoroughly on the surface to activate the gluten. Do this for around 10 minutes. Leave the dough in a bowl, cover it with a damp cloth for 3 - 4 hours (depending on the weather; yeast requires warm and humid surrounding conditions to do its thing and rise the dough).
Your dough would have now doubled (or even more) in size. Lightly dust a flat surface and knock out all the air from the risen dough, knead it couple of times. Split the dough into two equal portions and shape it to form two lovely Italian loafs. Lightly dust baking tray and place the dough in it. Cover the tray with a damp cloth and leave it to further rise for around an hour.
 
Meanwhile, pre-heat oven to 180º C. The dough would have nicely risen by now. Lightly make few slanting scores with a sharp knife or blade. Please take care, the loafs are quite sensitive at this point. Mix the egg white and cold water in a bowl mix well to make a simple egg-wash. With the help of a pastry brush, lightly brush the egg-wash on the loafs. If you would like, you can sprinkle some sesame seeds on top of the loaf.
Bake the loafs for 35-40 minutes @ 180º C.

Tuesday, February 12, 2013

Chocolate Chip Cookie

Here's a quick and easy cookie recipe. The chocolate chip cookie is everyone's favorite and the classic accompaniment is hot milk...yumm. Though I like cookies a lot, I have never dared to enter the cookie-territory. Primarily because of my experience with baking cakes (I had my ups and downs...quite literally). This recipe turned out to be quite an easy one and once again I had surprised myself [pat pat]. Follow the recipe and I can guarantee nothing will ever go wrong....well almost ;)
Ingredients:
Butter - 120 gms
Castor sugar - 120 gms
Egg - 1, medium sized
Porridge oats - 105 gms
Milk - 1 ½ tbsp
Cocoa powder - 1 ½ tbsp
Vanilla essence - 1 ½ tsp
Plain flour - 130 gms
Baking powder - ½ tsp
Chocolate chips - 100 gms
Salt - a pinch

Method:
Preheat the oven @ 180º C.
In a bowl, combine sugar and butter, mix until fluffy. Beat in egg, mix thoroughly. Now add oats, milk, vanilla essence, mix till nicely blended. Sift the flour, baking powder, cocoa powder and salt into the mixture. To this add and mix the chocolate chips.
Place spoonful of the mixture on baking sheets, slightly flatten with a fork, leave some gap in between (cookie may spread and occupy more space while baking). Bake @ 180º C for around 15 minutes or until the cookies are slightly firm. Remove from the oven and leave it to cool over a wire rack.
This will yield around 13 to 14 delicious and mouthwatering cookies. You may store these in an airtight jar but i would recommend quick consumption as they are quite tempting :)

Sunday, October 28, 2012

Walnut-Fig Honey Wheat Loaf

Another variation to the humble loaf. Walnut and figs are match made in heaven.
Ingredients:
Whole wheat flour - 2 cup
All purpose flour (Maida) - 1 cup
Water - ¾ cup, Luke warm
Milk - ½ cup, Luke warm
Vegetable oil - ¼ cup
Dried active yeast - 2 tsp
Honey - ½ cup
Salt - 1 tsp
Walnuts - 80 gms, chopped
Figs - 80 gms, chopped
Semolina to sprinkle on baking tray
 
Method:
In a bowl, add milk and water, honey and yeast in it. Leave the yeast mixture for around 15 mins. Whisk in the oil, add salt. Take flour in a large bowl, form a well in the middle, add the yeast mixture little by little, keep mixing the flour with the help of a fork. Dust a flat surface with flour and knead the dough thoroughly on the surface to activate the gluten. Do this for around 4-5 minutes. Leave the dough in a bowl, cover it with a damp cloth for 2 - 3 hours (depending on the weather; yeast requires warm and humid surrounding conditions to do its thing and rise the dough).
 
Your dough would have now doubled (or even more) in size. Dust a flat surface and knock out all the air from the risen dough. Incorporate the walnuts and figs and shape the dough into the desired shape. Leave the dough to rise for around 2 more hours. Take a baking tray and sprinkle some semolina. Gently transfer the risen loaf into the baking tray. Pre-heat the oven @ 180º C. Bake the bread for about 40 minutes.
Once done, take it off the oven, brush some oil on the top to avoid a hard crust. Transfer the loaf onto a wire rack for cooling. This bread needs no accompaniments, but my personal favorite is peanut butter (gives it a nice nutty flavour).

Monday, July 30, 2012

Stuffed Bread

Another exciting bread recipe from your favourite home cook and friend. My parents who had visited us recently were pleasantly surprised with my newly acquired bread making skills.
Hope you would definately enjoy this recipe - Spicy, peppery filling with chicken, mushroom and onion stuffed in braided buttery bread is a match made in heaven :)
Ingredients:
Bread-
All purpose flour (Maida) - 3 cups
Water - ¾ cup, Luke warm
Milk - ½ cup, Luke warm
Butter - 100 gms, melted, cooled to room temperature
Dried active yeast - 2 tsp
Sugar - 2 ½ tsp
Salt - 1 ¾ tsp
Egg - 1 small, beaten with 1 tbsp water (egg wash)

Filling-
Onion - 2 large, finely sliced
Pepper - 3-4 tsp
Coriander powder - 1 tsp
Garam masala - ¾ tsp
Curry leaves - 3 strings, chopped
Chicken - 200 gms (breast or boneless thigh) , cut into thin slices
Button mushroom - 200 gms, sliced
Lemon - 1 medium sized, squeezed
Oil - ¼ cup
Jeera - 1 tsp
Coriander leaves - ¼ cup, chopped
Garlic - 10-12 cloves, ground
Garlic - 2", ground
Salt to taste

Method:
In a bowl, mix milk, water and butter, dissolve the sugar, salt and yeast in it. Leave the yeast mixture for around 15 minutes. Take flour in a large bowl, form a well in the middle, add the yeast mixture little by little, keep mixing the flour with the help of a fork. You can also use a hand blender with kneading attachment. If you feel the mixture is quite loose, cover it with a damp towel and leave it for couple of minutes before you start working on it again. Dust a flat surface with flour and knead the dough thoroughly on the surface to activate the gluten. Do this for around 4-5 minutes. Leave the dough in a bowl, cover it with a damp cloth for 3 - 4 hours (depending on the weather; yeast requires warm and humid surrounding conditions to do its thing and rise the dough).

Heat 1 tbsp of oil in a pan. Now add the mushroom, saute for a while. Let it sweat out all the water, add 1 tsp black pepper and salt. Saute till all the water has been evaporated. Now sprinkle some ½ of the lemon juice. Take it off the flame and let it cool down completely. Once cooled, spread it on a cutting board and roughly chop the mushroom.
Marinate chicken in the rest of the lemon juice and some salt for around 30 minutes. Heat 1 tbsp of oil in a pan, add the marinated chicken, saute and cook till just done. Switch off the flame. Once cooled, spread it on a cutting board and roughly chop.

In a shallow pan, heat the rest of the oil, splutter some jeera, add in the sliced onions. Saute till translucent and just about to turn brown. Throw in the ginger and garlic paste, saute till it gives off the raw flavour. Now add the curry leaves, saute for another 2-3 minutes. Add coriander powder, garam masala and rest of the pepper powder, mix for a minute. Add mushroom and chicken. Adjust the seasoning, cook for another 5 minutes. Switch off and let it completely cool down.

Your dough would have now doubled (or even more) in size. Dust a flat surface and knock out all the air from the risen dough, knead it couple of times. Divide the dough into two equal parts. Roll each of the dough balls into rectangular shape roughly sized 8" by 12" and about 1 to 1.5 cm thick. Leaving around 3" in the middle (3" by 12" for laying the filling), make inclined cuts to form 1" finger strips on either sides. Now place equal amount of filling in the both the dough batches, sprinkle the chopped coriander over the filling. Fold the top and the bottom edges of the dough on top of the filling. Now fold the finger strips laying it over the filling to form braid like structure. Place it over a baking tray and let it proof for around 1 to 2 hours.
Now brush the egg wash gently (do not apply pressure, they are very delicate at this point). Pre-heat the oven to 180ºC. Bake the bread @ 180ºC for around 35 minutes. Once done, take it off the oven, brush some oil on the top to avoid a hard crust. Take the bread out of the tray and on to a wire rack for cooling.

Monday, July 2, 2012

Classic White Bread

Simple and easy to do recipe for a perfect sandwich bread. The aroma coming out of the hot oven baking your bread is simply intoxicating and I just love it. Hope you enjoy the recipe as much as I loved baking it
Ingredients:
All purpose flour (Maida) - 3 cups
Water - 1 cup, luke warm
Milk - ½ cup, luke warm
Oil - ¼ cup
Active dry yeast - 2 tsp
Sugar - 2 ½ tsp
Salt - 2 tsp

Method:
In a bowl, add milk and water, dissolve the sugar and yeast in it. Leave the yeast mixture for around 10 mins. Whisk in the oil, add salt. Take flour in a large bowl, form a well in the middle, add the yeast mixture little by little, keep mixing the flour with the help of a fork. You can also use a hand blender with kneading attachment. If you feel the mixture is quite loose, cover it with a damp towel and leave it for couple of minutes before you start working on it again. Dust a flat surface with flour and knead the dough thoroughly on the surface to activate the gluten. Do this for around 4-5 minutes. Leave the dough in a bowl, cover it with a damp cloth for 3 - 4 hours (depending on the weather; yeast requires warm and humid surrounding conditions to do its thing and rise the dough). Your dough would have now doubled (or even more) in size. Dust a flast surface and knock out all the air from the risen dough, knead it couple of times and then get it into the desired shape. Lightly grease the bread tin. Place the dough into the tin. Cover the tray with cling wrap and leave it to further rise for around 2 hours. The dough would have nicely risen by now.
Pre-heat the oven @ 180º C. Bake the bread for about 40 minutes. Once done, take it off the oven, brush some oil on the top to avoid a hard crust. Take the bread out of the tin and on to a wire rack for cooling.
You can make your favorite sandwich or simply settle down with jam/peanut butter/nutella.

Wednesday, June 27, 2012

Spinach and Mushroom Quiche with baby Potatoes

Another classic French recipe from the Smoking Tava, Quiche is an open faced pastry-crust (shortcrust pastry) filled with savory custard and meat or vegetable filling. In this recipe I have used Spinach, mushroom and baby potatoes but you can go wild with your imagination and make your own filling. This is my first attempt and I'm quite impressed with the outcome.
Ingredients:
Shortcrust pastry-
All purpose flour (Maida) - 200 gms
Butter - 100 gms, chilled, cut into cubes
Egg - 1 medium sized, beaten
Pinch of salt

Filling-
Baby potatoes - 4-5, peeled and boiled until just done
Button mushroom - 150 gms, sliced
Spinach - 200 gms, large leaves with stalks removed.
Eggs - 4 medium sized
Double cream - 250 ml
Dried chives - 1 tsp
Chilly powder or Cayenne pepper - ½ tsp
Black pepper powder - 1 tsp
Nutmeg powder - a pinch
Parmesan cheese - 25 gms, grated
Olive oil (cooking) - 2 tbsp
Lemon juice - from ½ lemon
Salt to taste

Method:
For the shortcrust pastry, add flour, butter and salt into a food processor and run it briefly. Add half of the egg and run it again. Add more egg, just enough to make the mixture moist and to bring it together. On a flat work surface, make a ball out of the mixture and then flatten it until its around 1 cm thick. Wrap it in a cling film and place it in the refrigerator for around 30 mins. Pre-heat oven to 180º C. The pastry needs to be blind baked first before we can add in the filling. Line a 9 inch tart tin with the pastry and then with a layer of foil or butter paper. Fill with baking beans or dry pulses/rice (so that the edges of the pastry are held together and does not fall in). Bake in the oven for about 20 mins or till the pastry is just dry. Take out the foil/butter paper, brush the inside of the pastry with the leftover egg. Place it back into the oven for another 5 minutes. Once done take it out and let it cool.

Now prep the filling - Put spinach leaves in boiling water, just as the leaves turn slightly dark and still green, take it off and immediately put in cold water. Squeez excess water and shred the spinach leaves into small bits using your hands.
Heat a pan, add olive oil. Now add the mushrooms, let it sweat out all the water, add ¼ of the black pepper and salt. Saute till all the water has been evaporated. Now sprinkle some lemon juice. Take it off the flame and let it cool down completely.
In a bowl, beat 4 eggs, add cream, chilly powder, black pepper, dried chives, parmesan cheese, nutmeg. Nicely blend the mixture. Add spinach to the cream mixture. Slice the boiled potatoes around ½ cm thick. Spread the potato slices on the pastry almost covering the bottom. Evenly spread the mushroom. Now spoon in the creamy spinach mixture until the pastry is about 95% filled (the mixture may rise further because of the eggs). Bake in the oven @ 180º C for about 40 minutes until its golden brown and is just set in the center. Remove from the oven, allow it cool for around 10 minutes.

Sunday, March 11, 2012

Chicken Stuffed Bun


Ingredients:
Bun -
All purpose flour - 4 cups
Active dry yeast - 2 tsp
Water - ¾ cups, luke warm
Milk - 1 cup, luke warm
Sunflower oil  - ¼  cup
Sugar - 1 ½  tsp
Salt - 1 ½  tsp

Chicken stuffing -
Onion - 3 medium, sliced
Minced chicken - 250 gms
Curry leaves - 1 tbsp, roughly chopped
Coriander powder - 1 tsp
Garam masala - ¾ tsp
Ginger - 1 tbsp, chopped
Chicken masala - 1 tsp
Turmeric - ½  tsp
Red chilly powder - ½  tsp
Pepper powder - 2 ½  tsp, freshly ground
Oil - 2 tbsp
Salt to  taste

Method:
In small bowl, add water, sugar milk and yeast. Whisk the mixture thoroughly. Let it stand for 10 minute. Add salt and oil to the mixture. Take flour in a large bowl, make a well in the middle and pour the yeast mixture. Sprinkle some flour on the counter top and knead the dough thoroughly to incorporate some air into it. Place it back into the bowl and cover with a damp cloth. Keep it aside in a warm place (around 30º C) for about an hour and half.

Meanwhile, lets get on to making the stuffing. Heat a pan, add oil. Once the oil is hot, add onion, ginger and curry leaves. Saute till onion turns translucent. To this, add all the dry masala (coriander powder, garam masala, chicken masala, turmeric, chilly powder) along with 1 ½ tsp of pepper powder. Saute for around a minute or two. Now add the minced chicken, blend all the onion masala into the chicken. Cover and cook for 5 minutes on medium heat or until the chicken is done. Add the remaining 1 tsp of pepper powder, mix thoroughly. Take it off the heat and let is cool down completely.

By now the dough would have doubled in size. Sprinkle some flour on the counter top, and knead the dough to push the air out (this process is called knocking back the dough). Now divide the dough into 9-10 balls of about 90 gms each. Flatten each ball to form a disc of about 3-4 inch. Place the chicken stuffing in the middle, fold the edges together to seal the stuffing. shape it back into a ball and place on a greased baking tray (Remember to leave some space between the buns, they would further rise while proofing). Once all the buns are stuffed, keep it aside in a warm place for around 30 to 45 minutes.

Preheat the oven to 200º C. Bake the buns @ 200º C for 30 minutes. 10 minutes before the baking is finished, brush some butter over the buns. Place them back into the oven and continue the baking. Once done, allows the buns to cool.

You could replace the chicken with the stuffing of your choice. I suggest paneer would be a great choice for the vegetarians. Enjoy. Please don't forget to give me your feedback.

Sunday, March 4, 2012

Vegetarian Pizza

I have always wanted to try making pizza ground up, never had the confidence to attempt the dough and the sauce. Also, I don't believe you can make good pizzas with the ready to bake pizza-base available in stores. But now, having tried couple of bread recipes and pasta sauces I was pretty confident on the outcome.

On a Saturday evening I set out to prepare a vegetarian version, began making the dough, got the desired consistency, and the sauce came out well. I had some regained confidence in me. Baked the pizza, and voilà what a wonderful recipe it turned out to be.

So easy to make, I have decided not to order restaurant pizzas any more. I am sure after you try out the recipe you would more than agree with me :).
Ingredients:
Pizza base-
All purpose flour (Maida) - 4 cups, plus extra for dusting
Water - 2 cups, Luke warm
Active dry yeast - 2 tsp
Sugar - 2 tsp
Salt - 2 ¼ tsp
Butter - ½ cup, melted & cooled to room temperature

Tomato sauce-
Red ripe tomatoes - 700 gms
Onion - 1, small sized, finely chopped
Garlic - 3, large cloves
Chilly flakes - 1 tsp
Olive Oil - 2 tbsp
Dried oregano - 1 tsp
Dried basil - 1 tsp
Sugar - 1 tsp
Salt to taste

Toppings [You can add your own toppings]-
Paneer/Goat cheese/Tofu - 200 gms, cut into small bite sized chunks
American corn - ½ cup
Green capsicum (bell pepper) - 2, medium sized
Onion - 1 large, thick sliced
Mozzarella cheese - 200 gms
Black pitted olives - 10 to 12, medium sliced
Green Chilly - 2, finely sliced

Method:
In small bowl, add water, oil, sugar, salt and yeast. Whisk the mixture thoroughly. Let it stand for 10 minutes. Take flour in a large bowl, make a well in the middle and pour the yeast mixture. If the dough gets too gooey, let it stand for about 5 minutes. Sprinkle some flour on the counter top and knead the dough thoroughly for about 5 minutes. This will help to incorporate some air into the dough and also activate the gluten.  Place it back into the bowl and cover with a damp cloth. Keep it aside in a warm place (around 30º C) for at least 2 hours.

Meanwhile, lets get on to making the sauce. Cut the tomatoes into half, remove most of the seeds using your fingers. Then cut them into quarters. Heat the oil in a pan, add onion, saute till translucent. Add garlic and the chilly flakes. Saute till the garlic gives off its aroma. Add tomatoes and cook on a high flame till the sauce thickens. With the help of a wooden spoon mash the tomato as much as possible. Add salt, basil and oregano. Cook for another 10 minutes. Switch off the heat, let it cool. Roughly blend the sauce in a blender/food processor. Keep it aside.
Preheat the oven @ 220º C. Keep the toppings within reach. By now the dough would have doubled in size. Sprinkle some flour on the counter top, and knead the dough to push the air out (this process is called knocking back the dough). Divide the dough into two equal portions. I like my pizza crust thick, but in case you like a thin crust, you can make three out of this batch. If you want do not want to utilize the entire dough now, you could wrap it up in a cling wrap and place it in the refrigerator for later.
Roll each portion of the dough into a 9 inch sized disc, place it on to a meshed pizza tray. If you don't have space int he oven to bake all the pizza at once, you may place the rest of the dough in a bowl and cover it with a damp cloth. Spread the tomato sauce on the base, cover the base with mozzarella cheese and add the toppings. Pop it into the oven @ 220º C for 20 minutes or until done (preferably in the middle rack, that way it would cook from the bottom as well).
Enjoy delicious pizza straight out of the oven.

Walnut Brownie

A pack of walnut has been lying around for couple of weeks now. Well, what better way to make use of it than bake brownies. Years back I had prepared the egg less version which was too good, so wasn't sure how this would turn out. Well, it turned out quite well and dense in the middle just the way I wanted it to be. I am sure you'll like it as well.

Ingredients:
Walnut - 150 gms
Eggs - 3, at room temperature
Sugar - 200 gms, powdered
Salt - ½ tsp
Baking powder - ½ tsp
Dark chocolate bar - 200 gms
All purpose flour (Maida) - ½ cup
Sunflower oil - ½ cup
Vanilla essence - 1 ¼ tsp
Cocoa powder - ¼ cup
Butter for greasing baking tray

Method:
Preheat oven to 180º C. Grease and line a 9 inch square cake tin with butter paper. In a baking tray, spread the walnuts and roast it in the preheated over for around 5 minutes. Once done, cool it and chop it to small pieces.

Melt dark chocolate in a bowl using double boiler and keep it aside. In a bowl, start beating the eggs one by one. To this, add sugar, oil, vanilla essence, salt. Beat till pale and creamy. Now add this mixture slowly into the melted chocolate, keep beating on a medium speed until thoroughly mixed.

Sift flour, cocoa powder and baking powder into the chocolate and egg mixture, fold it nice and slowly until its blended completely. Now fold in the walnuts and pour the mixture into the baking tin. Tap the baking tin on the counter top to remove any bubbles trapped in the mixture. Put it in the oven @ 180º C and bake for 35 minutes or until done.

Hope you enjoy the brownies. Please don't forget to leave your valuable comments.

Sunday, February 26, 2012

Naan - Indian Bread

I just love bread. The aroma of freshly baked bread is simply intoxicating. Baking good bread depends completely on getting the right proportions of flour and fluids and I would urge you to use standard measuring utensils while following these recipes (and not rely on the tea and table spoons available in your kitchen). In this recipe I present to you "Naan" or "Naan Bread" (for the rest of the world), one of the very easy to make Indian breads and definitely a high scorer on consistency, flavour and aroma.

Ingredients:
All purpose flour (Maida) - 4 cups
Active dry yeast - 2 tsp
Water - ¾ cup, Luke warm
Milk - ¾ cup, Luke warm
Sunflower Oil - 2 tbsp
Sugar - 1 ¼ tsp
Salt - 2 ¼ tsp
White Til (Sesame seeds) / Kalonji (Nigella)
Butter

Method:
In small bowl, add milk, water, oil, sugar, salt and yeast. Whisk the mixture thoroughly. Let it stand for a minute. Take flour in a large bowl, make a well in the middle and pour the yeast mixture. Mix it thoroughly. Its alright if the dough is gooey at this moment. Because gooey dough will guarantee a very soft Naan. Cover the bowl with a wet cloth and keep aside for around 30 minutes.

Apply oil to your palm before handling the dough. Divide into 7-8 dough balls and place them in a large plate. Cover it with a wet cloth and let is stand for 30 more minutes.

Flatten the dough balls on a counter-top, elongate on one side to get the signature Naan shape, sprinkle some sesame seeds or kalonji, and place them on a baking tray. Pre-heat the oven on grill mode for around 10 minutes. Place the tray on the top most rack, close to the grill. Bake for 4 minutes on each side or until done. Rub butter on both sides.

I bet these beautiful Naan needs no accompaniment and can be had without a curry. Hope you liked the recipe, leave a comment, tell me how it turned out for you.

Monday, February 6, 2012

Croissant

Bonjour friends...this is my first encounter with French cooking. And well what better way to start than with baking. Presenting to you, the classic French puff pastry....Croissant. The recipe does not have too many ingredients, but requires time, patience and lot of love.

Ingredients:
All purpose flour (Maida) - 4 cups plus some extra flour for dusting
Active dry yeast - 1 tbsp
Sugar - ¼ cup
Milk - ½ cup, luke warm
Water - ½ cup, luke warm
Salt - 2 ¼ tsp
Butter sticks - 200 gms, cold

Egg wash-
Egg - 1
Water - 1 tbsp

Method:
Take milk in a large bowl, add yeast, whisk nicely. Add sugar and salt, mix well. Now add 4 cups of flour, mix thoroughly (no need to completely knead the dough at this point). Roughly shape into a ball place it in a large plate and cover it nicely with cling wrap. Refrigerate overnight.

Place a large piece of cling wrap on the counter top, place the butter stick on top and cover it with another cling wrap. Now gently start beating the butter flat with a rolling pin. Flat it to around 1/2 cm thick. Repeat for the the rest of the sticks. Put the flattened butter back to the refrigerator. Now take out the dough and roll out to from a 12 inch square. Place the flat butter sheets in the centre of the square and arrange next to each other. Fold one flap of the dough covering the butter, stretching it slightly so that the point just reaches the center of the butter. Repeat for rest of the flaps. Press the edges together to completely seal the butter inside the dough. Dust the dough and start rolling the dough lengthwise while keeping the width as is. Roll till the length is around 24 inches and width about 8 inches (Keep dusting the dough making sure it does not stick to the counter top). Now fold one end of the dough (along the length) till the middle, and then fold the other end to the middle (both ends meet at the center). Fold the dough from the center so that the dough forms a  6 inch x 8 inch rectangular shape. Place the dough in a baking tray, cover with cling wrap and refrigerate for ½ hour. Take out and roll the dough till the length is around 24 inches (lengthen the other sides this time, viz the open ended sides) and repeat the above process for three more times refrigerating the dough every time for ½ hour.

Once set in the refrigerator, take out and roll into a 40 inch x 8 inch long sheet. With a scale, make marks at 5 inch intervals on one side lengthwise. Mark intergvals of 2 ½ inch on the other side. With the help of a pizza cutter, cut triangles such that the base of the triangle is 5 inch. Once done, make 1 cm long cut right in the middle of base of the triangle. Now pull the edges slightly (on either sides of the cut) apart and fold and keep rolling in-wards towards the pointed edge of the triangle to form the basic croissant shape.  Now bring both the edges together to form the final croissant shape. Place it over butter paper set on a baking tray. Leave it in a warm place (around 30º C) for proofing. Make sure the place to not too warm or else the butter would just melt away. Keep it for around 2 hours.
Beat the egg and water in a bowl to form the egg wash. Now brush the egg wash gently (do not apply pressure on the croissants, they are very delicate at this point). Pre-heat the oven @ 200º C and bake for 20 minutes (after the first 10 minutes rotate the sheet and continue baking).

Enjoy the delicate and buttery flavoured croissant.

Sunday, January 29, 2012

Chocolate Muffin


Ingredients:
Plain flour - 200gms
Cocoa powder - 25 gms
Baking powder - 1 tbsp
Ground cinnamon - 1 tsp
Caster sugar - 115 gms
White Chocolate - 125 gms, broken into small pieces
Eggs - 2
Sunflower oil - 80 ml
Milk - 220 ml

Icing -
White chocolate - 100 gms
Water - 4 tbsp
Butter - 50 gms
Icing sugar - 350 gms

Method:
Preheat oven to 190º C. Line a 12-cup muffin tin with muffin paper cases. Sift the flour, cinnamon, baking powder and cocoa into a large mixing bowl. Add sugar and white chocolate to it and stir nicely.

Take the eggs and oil in a bowl and whist until frothy, then gradually whist in the milk. Slowly stir into the dry ingredients until just blended. Spoon the mixture into the paper cases until, filling ¾ full. Bake in the preheated oven for 20 minutes or until well risen. Leave it to cool for 2 minutes and then transfer to a wire rack to cool completely.

To make the icing, break the white chocolate into a small heat proof bowl, add water, butter, and set the bowl over a saucepan of gently simmering water until melted. Stir until smooth and leave to stand over the water. Now add the icing sugar and beat until smooth and thick.

Top the muffins with the icing.

Sunday, January 1, 2012

Chocolate Sponge Cake

What a nice way to kick off the new year with a delicious chocolate cake topped with two layers of icing.

Ingredients:
For the cake -
Refined flour (maida) - 2 cups
Baking powder - 2 tsp
Cocoa powder - ¼ cup
Milk - ½ cup
Butter (Unsalted) - 100 gms softened @ room temperature
Powdered Sugar - 1 ¼ cup
Vanilla essence - 1 tsp
Eggs - 3, seperate the egg white and yolk

Butter icing -
Butter - 45 gms softened @ room temperature
Icing sugar - 1 cup
Vanilla essence - ½ tsp

Royal icing -
Egg white - 1
Icing sugar - ¾ cup
Lemon juice - few drops

Method:
Take butter in a mixing bowl. With the help of a hand mixer (use egg beater attachment) start blending the powdered sugar into the butter on medium speed (put the powdered sugar slowly into the butter). Blend the sugar nicely into the butter to form a creamy texture. Now add the egg yolks one by one (keep mixing) into the mixture. Add vanilla essence and blend for another ½ a minute.

At this point you can pre-heat the oven to 180º C. Grease and line a 10-11 inch round cake tin with butter paper.
In another bowl sift the flour, baking powder and cocoa powder (I prefer to use Cadbury cocoa powder, the aroma is irresistable) and nicely mix them together.

Now add the dry flour mixture into the butter mixture slowly (keep blending on a low speed). Add milk. Once the flour is nicely blended into the butter mixture, keep it aside.

In a dry bowl, take the egg whites and beat it with the help of a beater (if you are using the same hand mixer, make sure you clean and dry the before using). You could use a whisk instead. Incorporate as much air as possible into the egg whites so that they form a foamy firm texture.

Add the foam into the wet cake mixture. The trick here is not to mix the egg white with the cake mixture quickly, but to fold the egg whites into the mixture in slow circular movements. Once all the egg blends into the cake mixture, pour it into the cake tin and bake for 40 mins @ 180º C.

When done take it out of the oven and let it cool. Once cooled, take it out of the tin and turn it upside down and apply a layer of butter icing. Once the icing is set, pour the royal icing mixture and spread it evenly with the help of a palette knife or a spatula.
For the butter icing - Take butter in a bowl, with the help of the hand mixer blend the icing sugar into the butter to form a creamy texture. Add vanilla essence and mix it nicely. Butter icing is ready.

For the royal icing - In a bowl, take the egg white and beat it so that it turns into firm foamy texture. Now gradually add icing sugar and continue beating on high speed to form a white and creamy texture. Add few drops of lemon juice to retain the whiteness.

Thursday, December 22, 2011

Honey Wheat Bread

I didn't want this year to end without posting any recipe on this blog and bring bad luck. Before the new year begins and I go back to making new year resolutions like all the previous years (which by the way don't even last a week) I have decided to do a Pre-New Year resolution - to be more active with the blog and post more and more of my delicious encounters in the culinary world.

Here's a simple and healthy wheat bread recipe that I enjoyed making. Its quite easy and needs no special skills.


Ingredients:
Wheat (Atta) - 3 ½ cup
Active Yeast - 1 ½ tsp
Honey - ¼ cup
Milk - cup
Salt - 1 ¼ tsp
Oil - ¼ cup
Water (luke warm) - 1 cup

Method:
Take a large mixing bowl. Add water and the yeast, mix thoroughly. To this, add honey, mix again and leave it for around 15-20 mins. Now add, oil, milk and salt, mix thoroughly with a whisk. Add atta to the mixture and knead it well to form a dough. Dust a flat surface with atta and then knead the dough thoroughly on the surface to incorporate some air into the dough. Do this for around 10 minutes. Leave the dough in a bowl, cover it with a wet cloth for 3 - 4 hours (depending on the weather; yeast requires warm and humid environment to do its thing and rise the dough). Your dough would have now doubled (or even more) in size. Roll the dough with your hands, form a cylinder roughly the lenght of your bread tray. Lightly grease the tray before putting the dough. Cover the tray with cling wrap and leave it to further rise for around 2 hours. The dough would have nicely risen by now.

Bake the bread in the oven (pre heated to 180º C) @ 180º C for 40 mins (After the first 20 mins of cooking, loosely cover the tray with aluminium foil and cook for the rest 20 mins). Once done, take it out of the oven, lightly brush the top of the bread with oil to avoid hard crust top. Allow the bread to cool.

Enjoy your home made honey wheat bread. Please try the recipe. Do leave your comments  and tell me how it turned out for you.

Also some inspiration for me to continue blogging :)